

Streamline your CSS for a faster website.
7 Proven Steps to Remove Unused CSS and Boost Site Speed
Published by Brand Nexus Studios on August 27, 2025
Understanding Unused CSS and Its Impact
Unused CSS refers to stylesheet rules that aren’t applied to any elements on your website. This often happens when using large frameworks like Bootstrap or when styles accumulate over time during development. For example, a developer might add styles for a feature that’s later removed, leaving orphaned CSS behind. This clutter can significantly impact your site’s performance.
Why does this matter? Bloated CSS files increase page load times, which frustrates users and hurts your SEO. Google prioritizes fast-loading sites, and a lean stylesheet can improve your Core Web Vitals, such as Largest Contentful Paint (LCP). By removing unused CSS, you can:
- Reduce file sizes for faster page rendering.
- Enhance user experience with quicker load times.
- Boost SEO rankings by improving site speed.
- Simplify code maintenance for developers.
Ready to optimize your website? Let’s dive into the seven steps to remove unused CSS and transform your site’s performance.

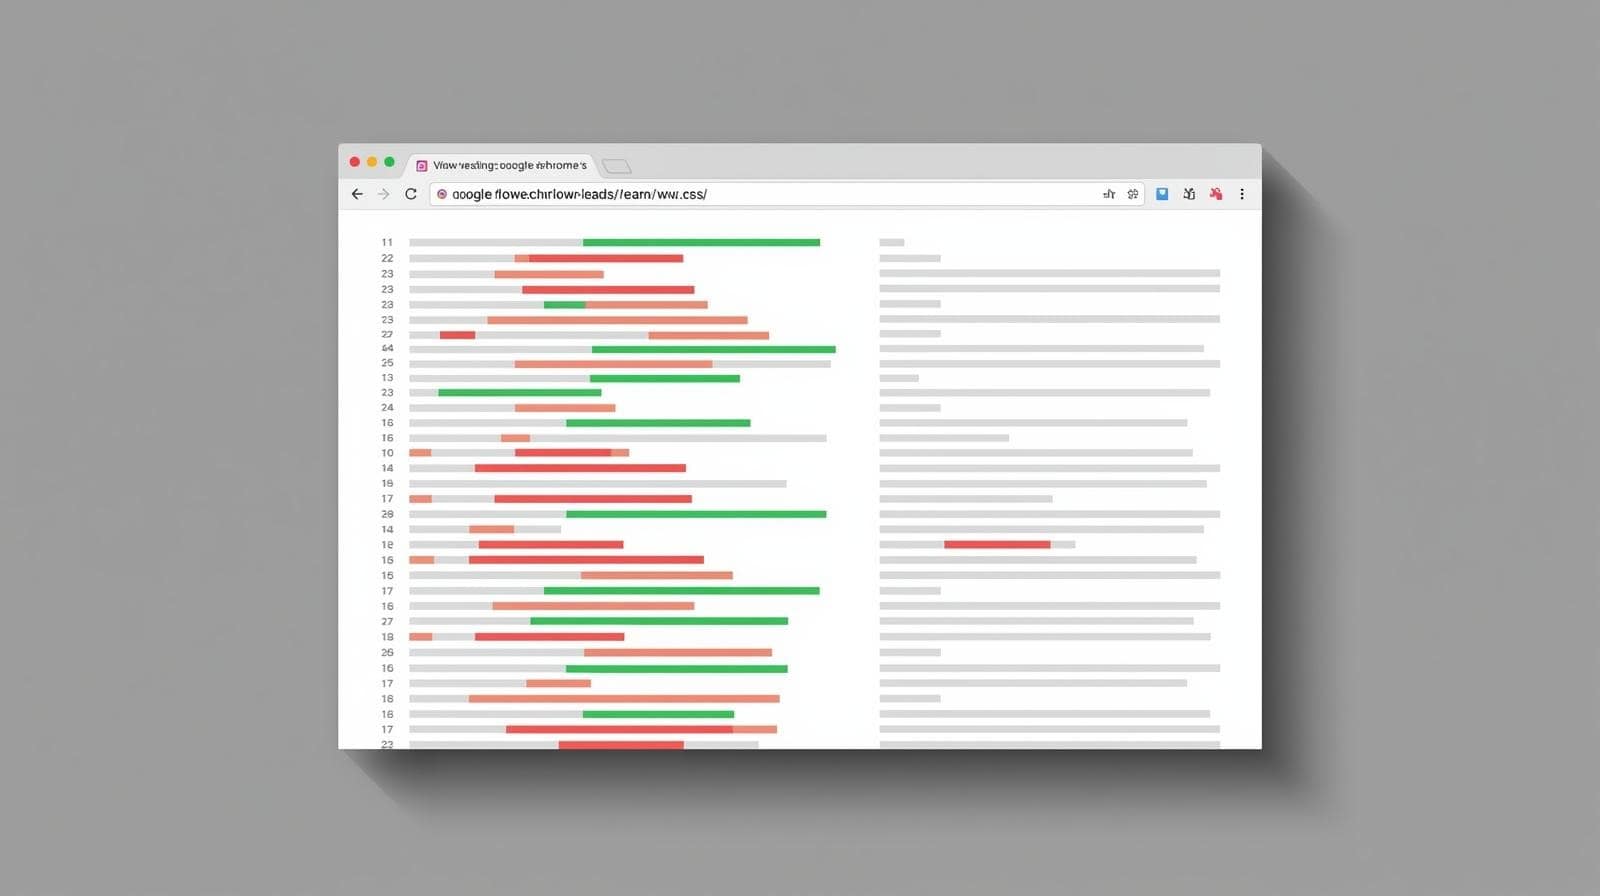
Step 1: Audit Your CSS with Chrome DevTools
The first step to remove unused CSS is identifying it. Chrome DevTools offers a built-in Coverage tab that’s perfect for this task. Here’s a detailed guide to using it:
- Open your website in Google Chrome and press
F12to launch DevTools. - Navigate to the Coverage tab. If it’s not visible, click the three dots in the top-right corner and select it from the menu.
- Click the “Record” button to analyze your page’s CSS usage.
- Once the analysis is complete, review the report. Red bars indicate unused CSS rules, while green bars show styles actively used on the page.
- Export the report as a JSON file for further analysis or to share with your development team.
This audit provides a clear snapshot of which CSS rules are redundant, helping you prioritize what to remove. For complex sites, run the audit on multiple pages to account for dynamic content or conditional styles.
Pro tip: Combine Chrome DevTools with Brand Nexus Studios’ analytics services to track performance improvements after optimization.
Step 2: Leverage Automated Tools for CSS Cleanup
Manual audits are valuable, but automated tools can streamline the process of identifying and removing unused CSS. These tools analyze your HTML and CSS files to pinpoint redundant styles. Here are some popular options:
- PurgeCSS: Ideal for modern workflows, PurgeCSS integrates with build tools like Webpack, Vite, or Gulp. It scans your project files and removes unused styles during the build process.
- UnCSS: A standalone tool that processes your HTML and CSS to strip out unused rules. It’s great for static sites or one-off optimizations.
- PurifyCSS: Perfect for single-page applications (SPAs), this tool detects unused CSS by analyzing your JavaScript and HTML.
- CSSNano: While primarily a minifier, CSSNano can help identify redundant styles during compression.
To use these tools effectively, ensure you include all relevant HTML files and account for dynamic content, such as styles applied via JavaScript or conditional rendering. For example, PurgeCSS allows you to whitelist specific selectors to prevent accidental removal of dynamic styles.
Automated tools save time and reduce human error, but they require careful configuration. Always test their output to ensure no critical styles are removed. Brand Nexus Studios can assist with integrating these tools into your development pipeline.

Step 3: Set Up a Staging Environment for Safe Testing
Removing unused CSS can have unintended consequences if not handled carefully. For instance, styles used only on specific pages or triggered by user interactions (like hover effects) might appear unused but are critical. To avoid breaking your live site, always test changes in a staging environment.
A staging environment is a replica of your live site where you can experiment without affecting users. Here’s how to set one up:
- Create a separate server or subdomain for testing (e.g., staging.brandnexusstudios.co.za).
- Copy your live site’s files and database to the staging environment.
- Apply CSS changes and test thoroughly across different pages, devices, and browsers.
- Use tools like BrowserStack to simulate various user conditions.
By testing in a staging environment, you can catch issues like missing hover effects or broken layouts before they reach your audience. Brand Nexus Studios offers professional staging setup and testing services to ensure your site remains flawless.
Step 4: Remove or Refactor Unused CSS
Once you’ve identified unused CSS, it’s time to clean it up. You have two primary options: deletion or refactoring. Here’s how to approach each:
- Delete unused rules: Use the audit results from Chrome DevTools or automated tools to manually remove unused CSS from your stylesheets. Be cautious with global stylesheets used across multiple pages.
- Refactor for efficiency: Combine similar rules to reduce redundancy. For example, if multiple elements share similar padding or font styles, consolidate them into a single class.
After cleanup, minify your CSS using tools like CSSNano or CleanCSS to further reduce file size. Minification removes whitespace and comments, making your CSS leaner without altering functionality.
Always back up your original CSS files before making changes. This allows you to revert if something goes wrong. For complex projects, consider working with a professional team like Brand Nexus Studios to ensure precision.

Step 5: Optimize for Critical CSS
After removing unused CSS, focus on critical CSS—the styles required for above-the-fold content. Critical CSS ensures that the visible portion of your page loads quickly, improving perceived performance and SEO metrics like First Contentful Paint (FCP).
To implement critical CSS:
- Use tools like CriticalCSS or Penthouse to extract styles needed for above-the-fold content.
- Inline these styles in the
<head>of your HTML to eliminate render-blocking resources. - Load non-critical CSS asynchronously using techniques like
loadCSSor deferred loading.
This approach reduces the time it takes for users to see your content, enhancing both user experience and SEO. For expert assistance, Brand Nexus Studios can optimize your critical rendering path.
Step 6: Implement Caching and Compression
CSS optimization doesn’t stop at removing unused styles. To maximize performance, combine your efforts with caching and compression techniques:
- Browser caching: Configure your server to cache CSS files, reducing load times for returning visitors. Use cache-control headers to set expiration times.
- Gzip or Brotli compression: Enable compression on your server to reduce CSS file sizes during transfer. Brotli offers better compression ratios than Gzip.
- Content Delivery Network (CDN): Use a CDN to serve CSS files from servers closer to your users, minimizing latency.
These techniques amplify the benefits of removing unused CSS. Brand Nexus Studios provides hosting solutions with built-in caching and compression for lightning-fast performance.

Step 7: Monitor and Maintain Your CSS
CSS optimization is an ongoing process. As your website evolves with new features, pages, or design changes, unused CSS can creep back in. To keep your site lean, schedule regular audits every 3-6 months or after major updates.
Tools like Google Lighthouse, Pingdom, or Brand Nexus Studios’ analytics services can help you monitor performance metrics like page speed and CSS efficiency. Set up alerts for performance drops and review your stylesheets periodically to catch new redundancies.
By maintaining a clean CSS codebase, you ensure long-term performance and SEO benefits. Partner with Brand Nexus Studios for ongoing maintenance and optimization services.
Common Pitfalls to Avoid When Removing Unused CSS
While removing unused CSS is straightforward, there are pitfalls to watch out for:
- Overzealous deletion: Automated tools might remove styles used in edge cases, like mobile-specific or JavaScript-triggered styles. Always whitelist critical selectors.
- Ignoring dynamic content: Single-page applications or sites with lazy-loaded content require extra care to ensure all styles are analyzed.
- Skipping testing: Failing to test changes can lead to broken layouts or missing styles. Always use a staging environment.
By being methodical and testing thoroughly, you can avoid these issues and achieve a lean, high-performing stylesheet.
FAQs About Removing Unused CSS
What is unused CSS and why should I remove it?
Unused CSS refers to styles in your stylesheet that aren’t applied to any elements on your website. Removing it reduces file size, improves page load speed, and enhances SEO by making your site faster and more user-friendly.
What tools can I use to remove unused CSS?
Popular tools include PurifyCSS, UnCSS, Chrome DevTools Coverage, and PurgeCSS. Each tool analyzes your website to identify and remove unused CSS rules efficiently.
Will removing unused CSS break my website?
If done correctly, removing unused CSS won’t break your site. Always test changes on a staging environment and ensure dynamic or conditionally loaded styles are accounted for.
How often should I audit my CSS?
Audit your CSS every 3-6 months or after major site updates to ensure no new unused styles accumulate, keeping your site optimized.
Conclusion
Removing unused CSS is a powerful way to boost your website’s performance, improve user experience, and climb search engine rankings. By following these seven steps—auditing with Chrome DevTools, using automated tools, testing in a staging environment, refactoring, optimizing critical CSS, implementing caching, and maintaining your styles—you can create a lean, fast-loading site. For professional help, contact morne@brandnexusstudios.co.za or visit Brand Nexus Studios for expert digital marketing, website design, and optimization services. Share your optimization tips in the comments or subscribe for more insights!